
Nissan Pathfinder Radio Removal
NOTE DISCLAIMER: I will not accept liability for anyone's repair attempts. This information is posted for informational purposes only. Don't try this without proper training. Any repair attempts are at your own risk. It may not be the same problem that mine had. Don't hold me financially liable to any damage or expenses you may incur. This may void any type of warranty on your radio. This fix suggestion is not meant to put anyone's audio repair business out of business, etc,...
![]()
![]()
Nissan Pathfinder '00-'01 - ERR2 on 6 Disc CD Changer
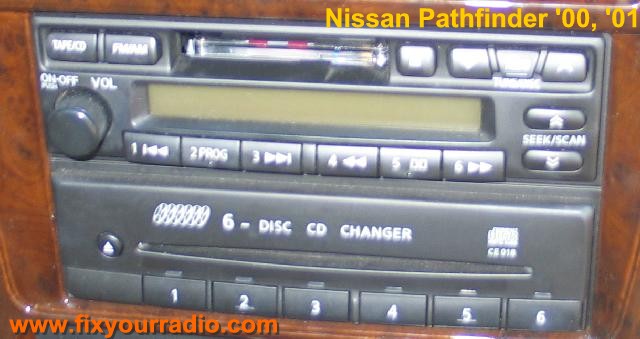
Figure 12 - Nissan Pathfinder 2000 -
2001
If you have a Nissan Pathfinder (approximate years 2000-2001) that has a 6 disc CD changer that is causing you trouble, we fix those! The typical problem is the CD will click, click, click, and then an ERR2 will appear on the radio. It requires that you send it in for the repair (sorry, no do-it-yourself instructions at this time). There is approximately a 3-4 week turn around time. The cost is $225 plus shipping/insurance. If you are interested in this service, please contact us at dharrison@ab-tech-inc.com . We can provide you with the instructions to remove your radio from the dash and how to send in just the malfunctioning CD unit (you can keep the radio portion so you're not running around with no tunes while the CD is getting fixed.
![]()
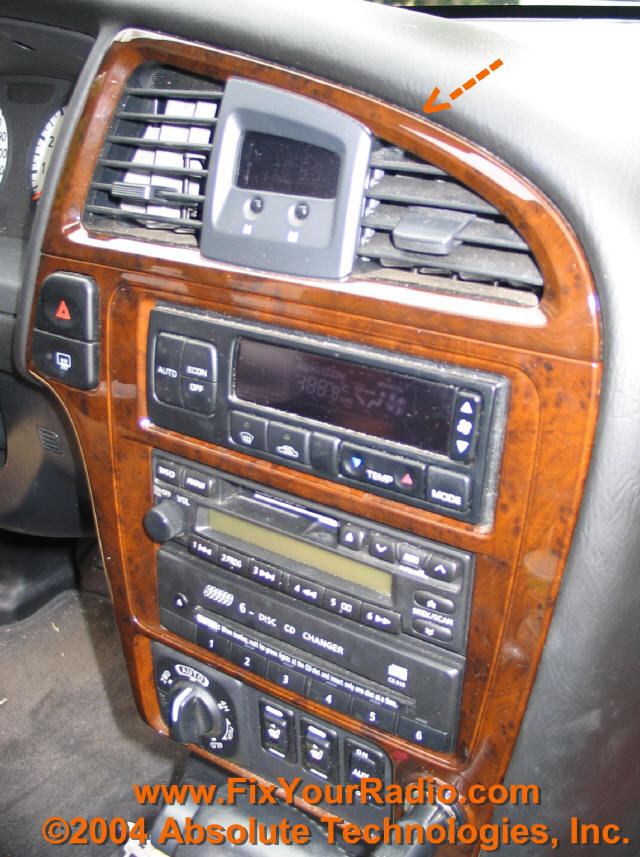
Figure 1 - Orange Arrow points to where you are going to jockey in a screw
driver (protected by a thick material) to pop out the vent (this is the hardest
part and tricky).
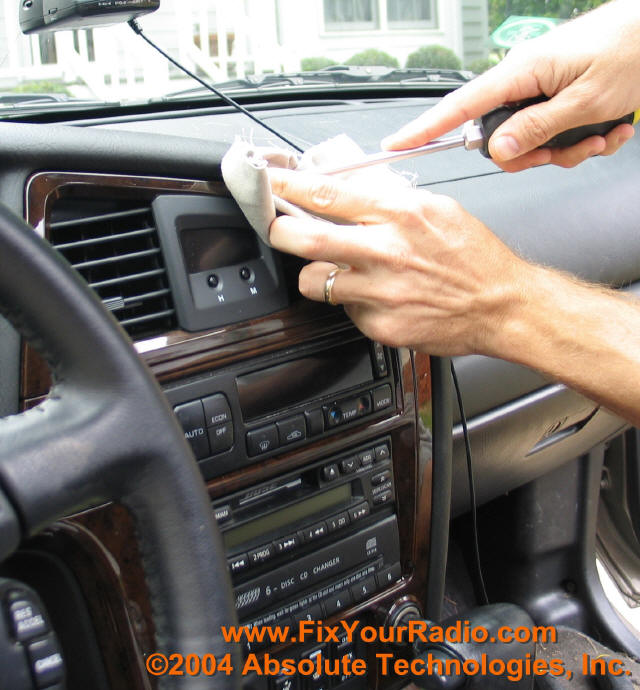
Figure 2 - Insert a screw driver with a thick piece of material in between the
soft dash and the wood trim panel. Holding on to the vents of the AC,
jockey the screw driver and pull via the vents to get this portion of the dash
off.

Figure 3 - The orange arrows show the clips that retain the vent in the dash.
These are the clips you are working against to free the vents from the front
dash. Once you get this piece out, you can flip it over towards the
steering wheel to keep it out of your way (if you want, you can disconnect the
clock connector (which requires squeezing a tab internal on the connector to
release it).
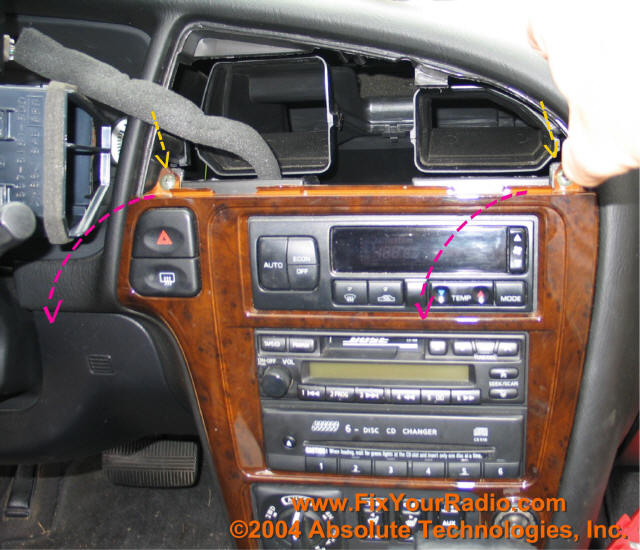
Figure 4 - Yellow arrows point to the two screws that are holding this lower
trim panel in place. Remove them. The pink arrows shows how you are
going to pull from the top and then work your way down to get the other clips to
release this panel.
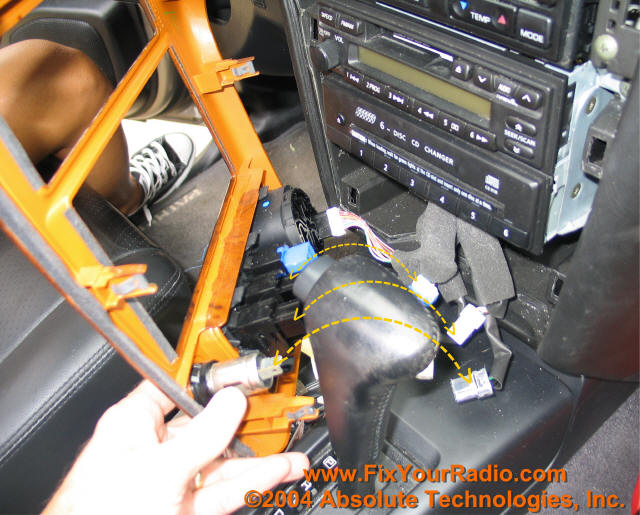
Figure 5 - Before you can jockey this panel around the gear shifter, you will
need to disconnect the connectors to most of the toggle switches on this panel
(you may leave the connection on the closest to the driver side). The
connectors all have a small tab in the center of their body that needs to be
pushed in (may require the tip of a screw driver) so that the connector will be
able to be pulled from its mating connector. All connectors should be
unique, so there is only one connector that it will match up too (no need to
label where they go...they can only go one way). Remove the connectors
necessary to flip the panel over the gear shift and towards the driver's side.
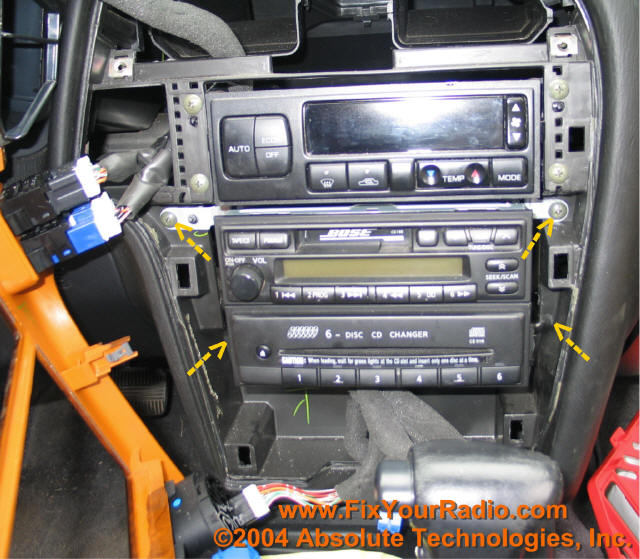
Figure 6 - Remove the 4 screws holding the radio in the dash. There are a
series of connectors (seven total I think) that must be disconnected to get the
radio completely out.
Each connector will have a small tab in the center of their body that needs to be pushed in (may require the tip of a screw driver) so that the connector will be able to be pulled from its mating connector. All connectors should be unique, so there is only one connector that it will match up to (no need to label where they go...they can only go one way).
With the radio out of the dash, there are two screws, one on each side of the radio, that need to be removed to allow the CD player to separate from the radio unit.
With the radio assembly out, you will need to remove the screws in the side of the radio and from the brackets of the assembly to get the CD exchanger free. The screws in the side of the radio can be EXTREMELY stubborn. The only way I can usually get them out is by using a T-handled screwdriver as shown in Figure 19 below...it can be bought at a place like Home Depot.
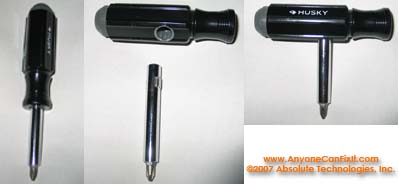
Figure 7 - T-handle Screwdriver
The radio can be reinstalled into the dash and operated while your CD player is being repaired. Let me know if you have any additional questions.
Any problem can be fixed on these radios or CD units for $225 plus shipping/insurance (typically $24.99 for 2 day US Priority Mail with insurance). Repairs on the radio or the CD unit are considered separate repairs (each unit must be repaired separately).
***************************************************************
IMPORTANT
NOTICE - Locking the Dampers
Before shipping, you must ensure that the mechanical damper of the unit is
locked (that the CD mechanism is parked). If it is not locked, there is a
high probability that the unit and damper will be damaged during transport.
Units received that have not been properly locked may be subject to back charges
for resulting damage.
If you have discs that are stuck within the unit and cannot do this locking procedure, don't worry. You may still ship your CD exchanger in and we'll remove the disc(s) and return them with your repaired unit.
FOLLOW THE STEPS BELOW TO LOCK THE DAMPER
HOW TO LOCK THE DAMPER:
1. Turn ACC off.
2. Press and hold the EJECT button for more than 1.5 seconds. All the CD's in the mechanism will be ejected sequentially.
3. Press any disc number key TWICE. The mechanism will move downward to the parking position and stop. The dampers are now locked. This process takes about 10 seconds.
Note: Do not cut off the back up power (do not unplug the connectors) until the completion of mechanism movement. If ACC is turned on after the mechanism is locked, it will be unlocked automatically and the locking procedure will need to be repeated.
The procedure will also work on the Sentra radio with 6 disc CD player, Nissan Pathfinder (as pictured above), and the QX4 with cassette and 6 disc CD player.
![]()
DID YOU FIND THESE INSTRUCTIONS USEFUL?
If you have found these instructions useful, then please consider a donation. It helps keep this web site up and running and supports more development of this type material.
Thanks for your kind consideration.
To make a $3 donation using PayPal, click the donate button below...
To make donation of $3, $4, $5, or $10 using Google Checkout (or a credit card), make your selection below and click the Google Checkout button...
Again, thanks for your consideration.
![]()
Please contact me if you have any questions (dharrison@ab-tech-inc.com)
You may send your radio or CD unit to:
Absolute Technologies, Inc.
Attn: Duane Harrison
PO Box 601
Holly Springs, NC 27540
Please include a detailed description of the problem that you are experiencing. Please allow 4-6 weeks for the repair. All repairs come with a 90 day warranty. You may include your payment with your radio or you may use PayPal and use the link below (if using PayPal you may wait until I am ready to ship your radio back....I will send an email when the radio is ready for return).
PATHFINDER RADIO OR CD REPAIR
$225.00 CD or Radio Repair + $24.99 Shipping = $249.99 Total
![]()
What People are Saying About this Repair
Really...this was not a paid endorsement...just another Happy Customer...
Hi Duane….
Thanks very much for making a tough job easy. I had been quoted over $300
to “fix” my PathFinder CD-exchanger, and when I saw your Web site after a
search on the problem, I was happy to see that you could do the same thing
for much less, with a small amount of work on my part.
Your instructions for removal were perfect, good photos and descriptions made the job easy. Installation was a snap, because I’d already been there (reversing the steps). The quick turnaround once I mailed off the unit to you made it well worth the relatively low price.
After 5 years of listening to “clickity-clickity-click”, I’m listening to my favorite artists again, sorry I had wasted time pondering what to do!
I highly recommend your repair process to anyone with
the PathFinder 2001 “ERR2” CD Exchanger problem…before you think about going
to the local stereo store, dealer, or after-market unit.
Regards,
Al Kilby - al_kilby@NOSPAMmentor.com
(remove the NOSPAM for a valid email address)
![]()
Home Page
Radio
Removal| Ford/Quest
"The Fix" CD
Eject Error Fix
Chrysler
/ Jeep Fix
Save
My Sanity Instructions
Mail Payment
PayPal
Payment
Success
Emails
Post
a Comment
Other Explorer
Issues
Disclaimer
Sponsors
![]()
ALL CONTENTS ON THIS SITE ARE PROTECTED BY COPYRIGHT. EXCEPT AS SPECIFICALLY PERMITTED HEREIN, NO PORTION OF THE INFORMATION ON THIS WEB SITE MAY BE REPRODUCED IN ANY FORM, OR BY ANY MEANS, WITHOUT PRIOR WRITTEN PERMISSION FROM D. HARRISON. VISITORS OR USERS ARE NOT PERMITTED TO MODIFY, DISTRIBUTE, PUBLISH, TRANSMIT OR CREATE DERIVATIVE WORKS OF ANY MATERIAL FOUND ON THIS WEB SITE FOR ANY PUBLIC OR COMMERCIAL PURPOSE.